CloudWaitress
  • Overview
  • Getting Started
    • Hardware Requirements
    • 10-Minute Quickstart
    • Setup Your Menus
    • Configure Your Services
    • Customize Your Design
      • Hide Store Header Section (header image)
    • Managing Orders & Bookings
    • Promoting Your Store
  • How to Guides
    • Accepting Payments
      • 🔐Stripe+ Integrated Payments
        • Setup Integrated Stripe Payments
        • Using Stripe Integrated
        • Changing Bank Account / Debit Card Details Associated with an Express Account
      • Setup PayPal Payments
      • Setup Apple Pay with Checkout.com
      • Setup Stripe Payments
      • Set up Bancontact Payments
    • Adding Closed Hours
    • Adding Delivery Zones
    • Adding Staff Account
    • Bump Screen Technology
      • Mastering the Bump Screen
    • Cloudwaitress and Walletly
    • Design Customization - Advanced
      • Hide Store Header Section (image)
    • Examples of Dates & Times and their corresponding formats
    • Export/Import Menu Feature
    • How To Add Driver Tracking
    • How To Add SEO (Search Engine Optimization)
    • How To Change Weekly Reporting View
    • How to Create & Import a Menu Using a Spreadsheet
    • How to Enable Pre-Orders in CloudWaitress
    • How To Integrate Postmates with CloudWaitress
    • How To Integrate Walletly with CloudWaitress
    • How To Opt-Out of Google Hosted Fonts
    • How to Set Up Conditional Fees in CloudWaitress
    • How To Set Up Google Analytics Integration
    • How to Show/Hide Header Function
    • Link Directly to menu
    • Managing the Order Dashboard
    • Order Acknowledgement Feature
    • Pause Ordering Feature
    • Purchase A Domain Name
    • Set Maximum Orders Per Time Interval
    • Setup A Custom Domain
    • Setup An iOS & Android App
    • Setup Custom Checkout Fields
    • Setup Facebook Login
    • Setup Facebook Ordering
    • Setup Google OAuth Client ID
    • Uber Direct Setup Manual
    • Understanding Languages
      • How users can change languages on frontend
    • Understanding Printing
      • How to Set Up a Printer on Android
      • Printing - Windows Network Printing
      • Printing - Windows Shared Printing
      • Printing - API Key
      • Add a USB printer to Windows
      • Setup Split Printing
      • How to copy the printer API key
      • Setup Printing For Windows
  • Platform Information
    • Customer Accounts
    • Your Subscription & Billing
    • Special & New Features
      • Public Holiday Surcharge
      • Make Service Pop-Up Required
      • COVID-19 Discount for United Kingdom
      • Delayed Order Email Notification
  • Resellers
    • Overview
    • Getting Started
    • Documentation
Powered by GitBook
On this page
  1. How to Guides

Setup Facebook Login

Learn how to setup the Facebook login system for customers to easily create accounts using Facebook

PreviousSetup Custom Checkout FieldsNextSetup Facebook Ordering

Last updated 7 months ago

Visit and login to your Facebook account

On the top right corner, select "My Apps" and press "Add New App"
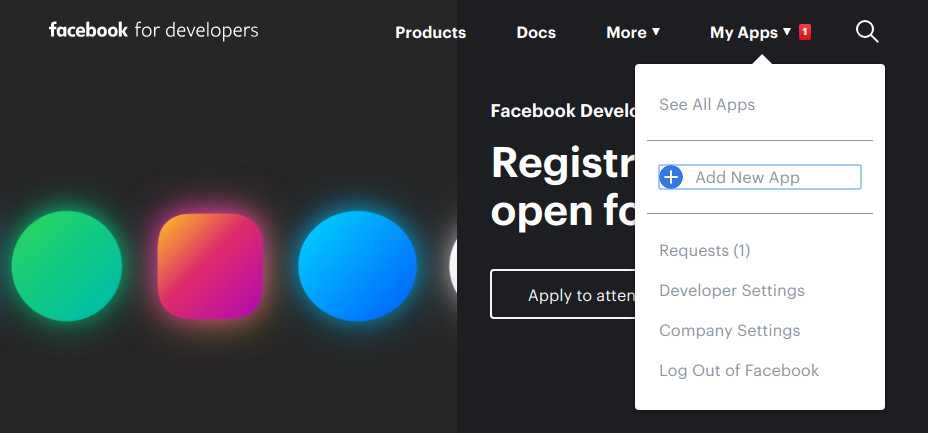
Fill out the form and create the app

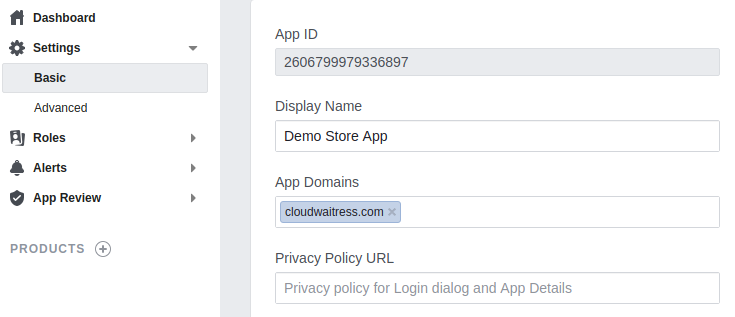
On the app dashboard the left menu, select "Settings > Basic". Enter your website domain into the "App Domains" field
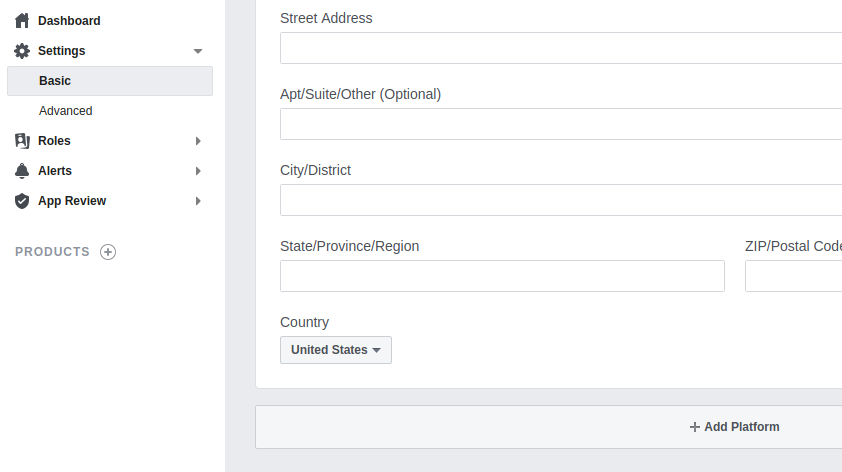
Scroll down and press the "Add Platform" button and select "Website
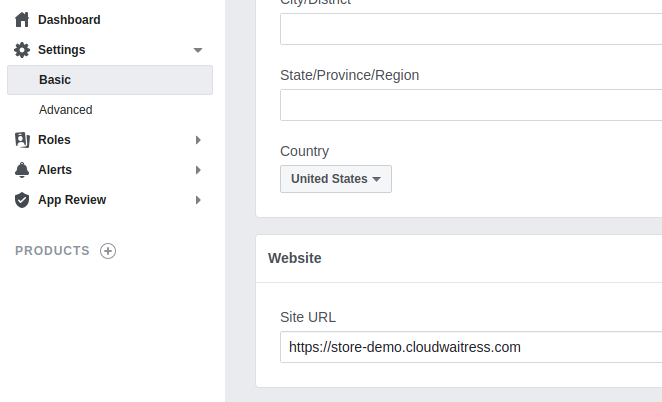
Enter your ordering site URL into the "Site URL" box and then press "Save Changes" on the bottom right.
On the left navigation menu, press "Products" and press the "Set Up" button for Facebook Login.

On the next screen, select "Web", you should see your "Site URL" already filled out, press "Save"
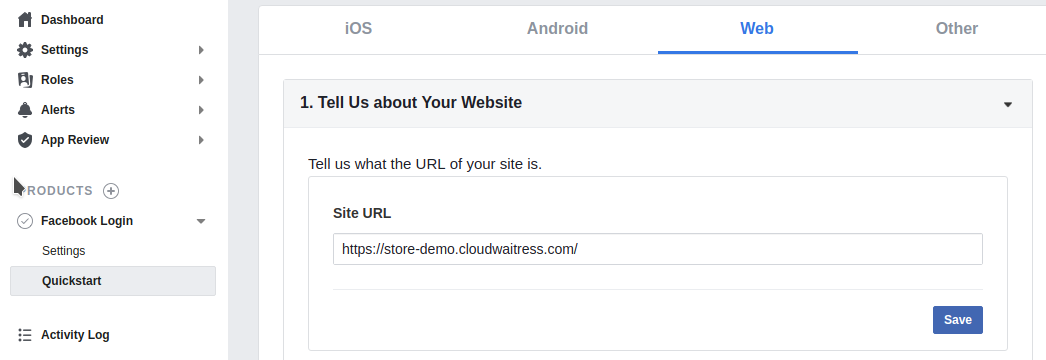
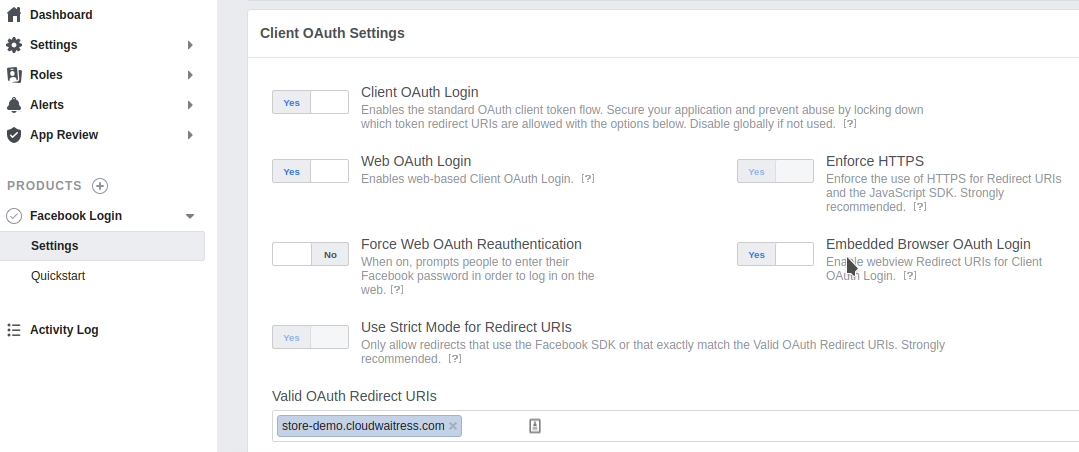
On the left menu, under "Products > Facebook Login", select "Settings"

Enable "Embedded Browser OAuth Login"

Enter your store domain into the "Valid OAuth Redirect URIs" field and press "Save Changes"
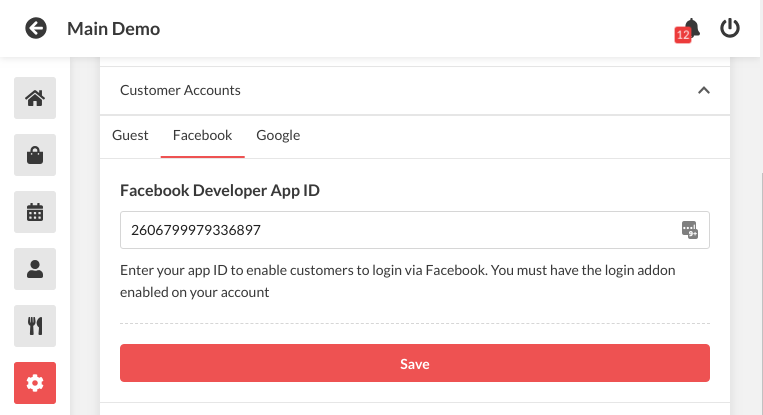
Finally, copy your Facebook App ID as shown on the top of the app dashboard

With the App ID copied, visit your restaurant dashboard and to "Settings > System > Customer Accounts > Facebook". Paste your App ID and press save
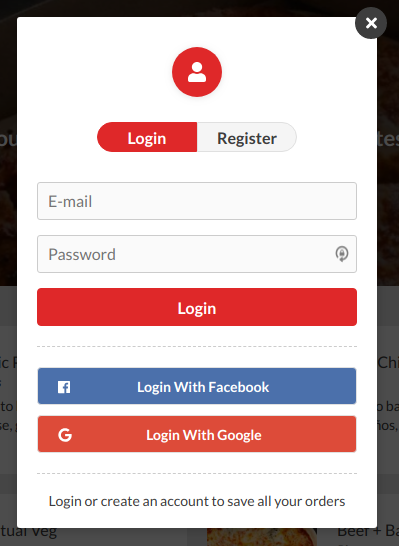
Visit your online store and confirm that the Facebook login option is available under the "Login / Signup" popup
https://developers.facebook.com/